

Resistance Band Strength Levels: How to Build a Consistent Product Range
Light, Medium, Heavy. The names look ready for a pack, but there is still a buying decision behind them. What goes into the carton when the purchase order says Medium? A particular band? An adjustable design? A set containing several items?
That is where we would begin a resistance band range. Put the actual items on a sheet before working on the colours. Use a row for the complete item you expect to sell, and take the sheet to the sample review. Try matching a loose sample to it.
If you have to ask which pack it belongs in, there is still a naming decision to make.
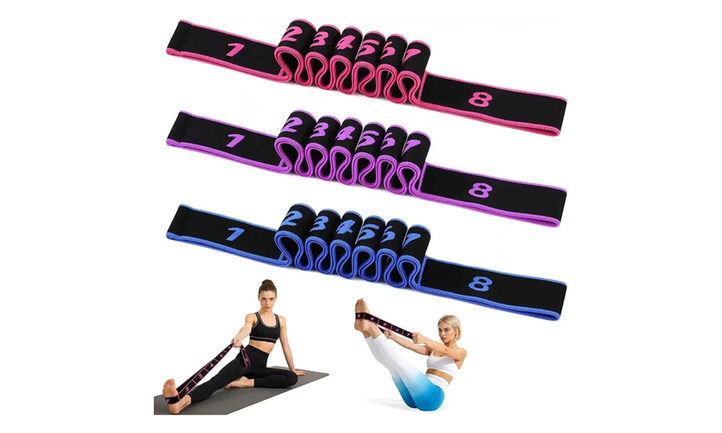
Adjustable resistance band with numbered positions
Decide whether a level identifies a product or a setting
Consider an adjustable band sold as one item. It has several numbered positions, yet the buyer orders the complete band. Calling every position a product level would leave the purchasing team with a rather odd assortment sheet: several entries for something that goes into one pack.
For a concrete product reference, our eight-setting adjustable band has numbered settings and integrated handle loops. When discussing that design, use the numbers to identify the settings. Give the complete item its own product reference on the range sheet.
The same sheet can also contain separately sold bands. We would put their product references in a different column from any position markings. Put a sketch in the row if two people could read the name differently.
The words on the eventual pack can wait until the buying team has decided what the row contains.
Here is a made-up working reference: RB-A, with its positions described in the next cell. In a sample request, that code would mean the whole item sketched in the row. The retail name could still be undecided. RB-A is used only to illustrate how to fill the sheet.
Read the proposed markings back to the designer. For each number, ask what a reader is meant to do with it. Point to a position? Select a setting? Read a claimed performance value? Leave the force requirement with the product specification if a measured claim is intended.
A spare column on a planning sheet is no reason to invent a value.
Give every tier a clear place in the range
Beside each proposed item, finish this sentence: we are including this because… An answer such as another colour is worth discussing before it becomes another strength tier. Does the brand want a colour choice within an item, or a separate place in the strength range?
We would use the following fields for that discussion. They are blank planning prompts; none supplies a resistance recommendation.
|
Range field |
Entry to settle |
|---|---|
|
Item reference |
The complete item being considered |
|
Place in the offer |
The reason to include it |
|
Tier name |
The proposed customer-facing wording |
|
Adjustment positions |
Settings within this particular design |
|
Sales unit |
A single item, a set, or both |
|
Muestra |
The physical reference for this row |
Read two neighbouring rows together. If their stated purpose is identical, ask what the extra row adds. Perhaps a distinction has been left out of the brief. Perhaps the second item belongs in a later launch.
Either answer is more useful at this stage than another finished pack design.
An adjustable design and a different construction may need separate sections on the sheet. Sketch each offer first, then decide how to present them together. Avoid filling in a comparison just to make the catalogue look complete.
An open question can remain an open question while the product team works on it.
There is room for future ideas too. Put them below the confirmed assortment, labelled proposed additions. The current sample request should identify which rows are being commissioned. A supplier should not have to decide whether a note in the margin is part of the order.
Two internal names may survive for a while during development. Record both in a notes cell, choose the wording for the confirmed row, and ask the departments involved to reconcile their documents. Once that is done, remove the temporary alternative from the next sample request.
Before sending the sheet out, read the confirmed rows aloud against the purchase request. Check that a row refers to the whole item intended for sampling. A packaging option can sit beside it as an option, with the decision still visible.
It need not become another strength tier merely to appear in the request.
Build one naming key for bands and packaging
Now bring the language together. For each confirmed item, collect the proposed band mark, pack name, listing name and any abbreviation. We suggest keeping those entries on the same row. Reading across it is easier than remembering which name appeared in which artwork file.
Add colour to the same row, with a note saying what you want it to mean. For a decorative choice, write decorative colour option. For a tier identifier, name the tier beside it.
That is the relationship being proposed for this range; do not leave a familiar colour scheme to explain it.
Take the made-up RB-A reference and add another, RB-B, for a pack exercise. Write a proposed set name above them. Underneath, copy the item names as they would appear in the contents list. The two codes in this example identify pieces, and carry no claim about force.
Read the pack copy against those entries.
There may be less room on the band than on the box. If you propose an abbreviation, show it in the key beside the long name. Ask the artwork team to use that exact short form.
A different abbreviation on the pack would need to come back for discussion.
At this point, attach the key to the individual-product brief. Our OEM resistance-band specification guide covers that brief’s manufacturing fields. Here the task is narrower: decide which item each name points to across the assortment.
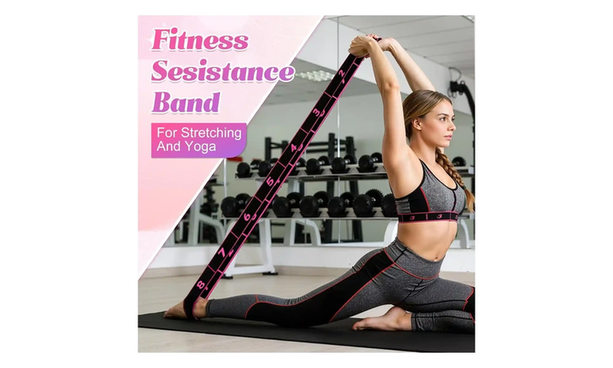
Resistance band handle loops and markings
Review the entire sample range together
Tell the supplier which assortment is being reviewed in this round. At the review, put a sample and the proposed pack copy beside each confirmed row. Leave a space where a requested item has not arrived.
An individual sample can be examined in detail, but the assortment decision also needs all the proposed members in view.
Begin by matching identities. Could another member of the buying team put the loose samples in the intended order? Make a note wherever a name, position mark or abbreviation leaves them unsure.
The useful outcome is a precise comment such as pack name differs from band mark, with both references attached.
Unfold the adjustable sample so the reviewer can trace all its markings. When a comment refers to the second one, stop and name the item and position. Is that RB-B on the sheet, or a numbered opening on RB-A?
Record the answer beside the comment while the piece is still on the table.
For a comment about feel, use the sample label to identify the piece examined. We would give those notes a space of their own on the review sheet. Where comparative measurements are required, refer the question to the agreed specification and test plan.
This review sheet has no test method of its own, so it should not turn a handling observation into a measured result.
Then assemble the smallest unit that will be sold. Put the label with a single item; place all intended members beside the contents list for a set. Count the identities on that list against the samples. Mark missing packaging or unresolved names before anyone calls the assortment approved.
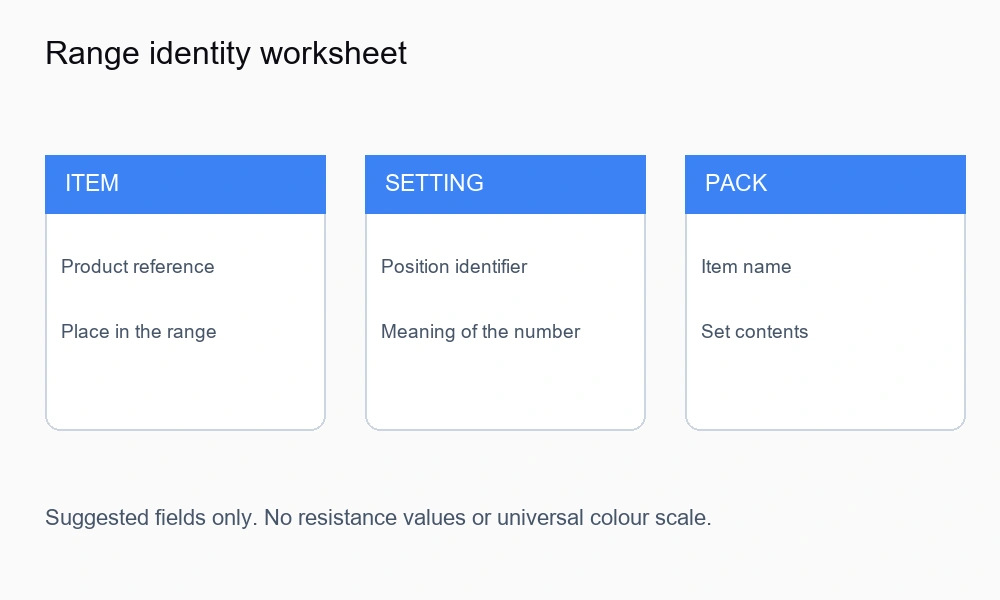
Resistance band range identity worksheet
Carry the range map into the OEM brief
Send the confirmed rows into the manufacturing discussion with their sample references. Include the proposed names, the settings within each design and the intended pack combinations. The recipient should be able to distinguish an item decision from a setting decision without tracing earlier messages.
Through our OEM and ODM services, you can discuss materials, widths, colours, patterns and finishes. Bring the naming key alongside those choices. If an item changes during development, return to its row and check what the change means for its label and pack relationship.
Preparado para discuss the range with Wubao? Send the range map and identify the rows to be sampled now. Circle the names still under discussion. That gives the next conversation an actual item, setting or pack to work on.


